-
[Spring Security] OAuth2 소셜 로그인 (세션 방식)Spring Framework 2024. 5. 17. 17:02
목표
- Spring Security와 OAuth2 세션 방식을 사용하여 구글, 네이버, 카카오 소셜 로그인을 구현한다.
- 로그인 사용자 정보를 MySQL 데이터베이스에 저장한다.
- authorization-grant-type : authorization_code 방식을 사용한다.
참고 자료
OAuth2.0이란?
- 사용자가 애플리케이션에서 안전하게 다른 서비스의 리소스에 접근할 수 있도록 해주는 인증 프로토콜이다. 사용자가 자신의 로그인 정보를 공유하지 않고도 제3자 애플리케이션에 권한을 부여할 수 있게 해준다.
- 사용자의 비밀번호를 직접 공유하지 않고도 애플리케이션이 사용자의 자원에 접근할 수 있다는 것이 주요 장점이다.
Authorization Code Grant Type
- OAuth2에서 사용하는 인증 방식 중 하나로 가장 많이 사용되는 인증 방식이다.
- 사용자가 로그인에 성공하면 인증 서버는 인증 코드를 반환한다. 이 코드는 애플리케이션이 액세스 토큰을 요청하는 데 사용된다.
- 애플리케이션이 인증 코드를 포함하여 인증 서버에 액세스 토큰을 요청한다.
- 인증 서버는 전달 받은 인증 코드가 유효하면 애플리케이션에 액세스 토큰을 발급한다.
- 애플리케이션은 이 액세스 토큰을 사용하여 리소스 서버로부터 사용자의 데이터를 요청할 수 있다.
전체 동작 방식
- 사용자가 로그인을 요청(/oauth2/authorization/서비스명)한다.
- OAuth2AuthorizationRequestRedirectFilter 가 로그인 요청을 가로채어 소셜 로그인 인증 서버로 리다이렉션 시킨다.
- 소셜 로그인 인증 서버에 도달하면 인증 서버는 해당 서비스 로그인 페이지를 응답한다.
- 로그인에 성공하면 인증 서버는 지정된 리다이렉트 경로(/login/oauth2/code/서비스명)로 리다이렉트한다. 이때 인증 서버가 인증 코드를 전달해준다.
- OAuth2LoginAuthenticationFilter 가 리다이렉트 요청을 가로채고 인증 코드와 등록 정보를 OAuth2LoginAuthenticationProvider에게 전달한다.
- OAuth2LoginAuthenticationProvider는 인증 서버로부터 액세스 토큰을 발급 받고, 리소스 서버에 접근하여 사용자의 정보를 획득한다.
- 획득한 사용자 정보는 OAuth2User 객체로 표현되며, OAuth2UserDetails와 OAuth2UserDetailsService를 통해 세션에 저장된다.
DB 설정 (JPA & MySQL)
더보기UserEntity
@Data
@Entity
public class UserEntity {

    @Id
    @GeneratedValue(strategy = GenerationType.IDENTITY)
    private Long id;

    private String username;
    private String email;
    private String role;
}
application.properties
spring.datasource.driver-class-name=com.mysql.cj.jdbc.Driver
spring.datasource.url=jdbc:mysql://localhost:3306/[데이터베이스명]?useSSL=false&useUnicode=true&serverTimezone=Asia/Seoul&allowPublicKeyRetrieval=true
spring.datasource.username=[사용자명]
spring.datasource.password=[비밀번호]

spring.jpa.hibernate.ddl-auto=create
spring.jpa.hibernate.naming.physical-strategy=org.hibernate.boot.model.naming.PhysicalNamingStrategyStandardImpl
UserRepository
public interface UserRepository extends JpaRepository<UserEntity, Long> {

    UserEntity findByUsername(String username);
}
OAuth2 변수 설정
- application.properties에 OAuth2 소셜 로그인을 위한 변수를 설정한다.
- 그렇게 하면 OAuth2AuthorizationRequestRedirectFilter → OAuth2LoginAuthenticationFilter → OAuth2LoginAuthenticationProvider까지의 과정이 자동으로 진행된다.
- registration : 인증 서버에서 클라이언트(애플리케이션)를 식별하고 인증하는 데 필요한 정보이기 때문에 설정이 필수적이다.
- provider : 서비스별로 정해진 값이 존재하며 구글처럼 유명한 서비스의 경우 따로 설정해주지 않아도 된다.
- 소셜 로그인 기능을 사용하기 앞서 각 서비스의 개발자 센터 등에서 별도의 설정이 필요하다. 이에 대한 설명은 검색을 통해 쉽게 확인할 수 있기 때문에 설명을 생략한다.
Google 설정#registration spring.security.oauth2.client.registration.google.client-name=google spring.security.oauth2.client.registration.google.client-id= spring.security.oauth2.client.registration.google.client-secret= spring.security.oauth2.client.registration.google.redirect-uri=http://localhost:8080/login/oauth2/code/google spring.security.oauth2.client.registration.google.authorization-grant-type=authorization_code spring.security.oauth2.client.registration.google.scope=profile,email
Naver 설정#registration spring.security.oauth2.client.registration.naver.client-name=naver spring.security.oauth2.client.registration.naver.client-id= spring.security.oauth2.client.registration.naver.client-secret= spring.security.oauth2.client.registration.naver.redirect-uri=http://localhost:8080/login/oauth2/code/naver spring.security.oauth2.client.registration.naver.authorization-grant-type=authorization_code spring.security.oauth2.client.registration.naver.scope=name,email #provider spring.security.oauth2.client.provider.naver.authorization-uri=https://nid.naver.com/oauth2.0/authorize spring.security.oauth2.client.provider.naver.token-uri=https://nid.naver.com/oauth2.0/token spring.security.oauth2.client.provider.naver.user-info-uri=https://openapi.naver.com/v1/nid/me spring.security.oauth2.client.provider.naver.user-name-attribute=response
Kakao 설정#provider spring.security.oauth2.client.registration.kakao.client-name=Kakao spring.security.oauth2.client.registration.kakao.client-id= spring.security.oauth2.client.registration.kakao.client-secret= spring.security.oauth2.client.registration.kakao.redirect-uri=http://localhost:8080/login/oauth2/code/kakao spring.security.oauth2.client.registration.kakao.authorization-grant-type=authorization_code spring.security.oauth2.client.registration.kakao.scope=profile_nickname, account_email spring.security.oauth2.client.registration.kakao.client-authentication-method=client_secret_post #registration spring.security.oauth2.client.provider.kakao.authorization-uri=https://kauth.kakao.com/oauth/authorize spring.security.oauth2.client.provider.kakao.token-uri=https://kauth.kakao.com/oauth/token spring.security.oauth2.client.provider.kakao.user-info-uri=https://kapi.kakao.com/v2/user/me spring.security.oauth2.client.provider.kakao.user-name-attribute=id
OAuth2Response
- 리소스 서버로부터 사용자 정보를 전달 받을 객체를 생성한다.
- 각 서비스마다 제공하는 데이터 형식이 다르기 때문에 인터페이스를 하나 정의하고 구현하도록 작성한다.
public interface OAuth2Response {

    // 제공자 (naver, google, ...)
    String getProvider();

    // 제공자에서 발급해주는 아이디(번호)
    String getProviderId();

    String getEmail();

    // 사용자가 설정한 이름
    String getName();
}
GoogleResponse
구글 데이터 형식더보기{ "sub": "12345678901234567890", "name": "John Doe", "given_name": "John", "family_name": "Doe", "picture": "https://example.com/profile-picture.jpg", "email": "johndoe@example.com", "email_verified": true, "locale": "en-US" }public class GoogleResponse implements OAuth2Response { private final Map<String, Object> attribute; public GoogleResponse(Map<String, Object> attribute) { this.attribute = attribute; } @Override public String getProvider() { return "google"; } @Override public String getProviderId() { return attribute.get("sub").toString(); } @Override public String getEmail() { return attribute.get("email").toString(); } @Override public String getName() { return attribute.get("name").toString(); } }
NaverResponse
네이버 데이터 형식더보기{ "resultcode": "00", "message": "success", "response": { "id": "12345678", "nickname": "John Doe", "name": "John Doe", "email": "johndoe@example.com", "gender": "M", "age": "30-39", "birthday": "10-01", "profile_image": "https://example.com/profile-image.jpg", "birthyear": "1980", "mobile": "010-1234-5678" } }public class NaverResponse implements OAuth2Response { private final Map<String, Object> attribute; public NaverResponse(Map<String, Object> attribute) { this.attribute = (Map<String, Object>) attribute.get("response"); } @Override public String getProvider() { return "naver"; } @Override public String getProviderId() { return attribute.get("id").toString(); } @Override public String getEmail() { return attribute.get("email").toString() ; } @Override public String getName() { return attribute.get("name").toString(); } }
KakaoResponse
카카오 데이터 형식더보기{ "id": 2803163587, "connected_at": "2023-05-23T22:59:40Z", "properties": { "nickname": "별명" }, "kakao_account": { "profile_nickname_needs_agreement": false, "profile": { "nickname": "별명" }, "has_email": true, "email_needs_agreement": false, "is_email_valid": true, "is_email_verified": true, "email": "email@naver.com" } }public class KakaoResponse implements OAuth2Response { private Map<String, Object> attribute; private Map<String, Object> kakaoAccountAttribute; private Map<String, Object> profileAttribute; public KakaoResponse(Map<String, Object> attribute) { this.attribute = attribute; this.kakaoAccountAttribute = (Map<String, Object>) attribute.get("kakao_account"); this.profileAttribute = (Map<String, Object>) kakaoAccountAttribute.get("profile"); } @Override public String getProvider() { return "kakao"; } @Override public String getProviderId() { return attribute.get("id").toString(); } @Override public String getEmail() { return kakaoAccountAttribute.get("email").toString(); } @Override public String getName() { return profileAttribute.get("nickname").toString(); } }
CustomOAuth2User, CustomOAuth2UserService 구현
CustomOAuth2User
- 사용자 정보를 다루는 커스텀 사용자 클래스이다.
@RequiredArgsConstructor
public class CustomOAuth2User implements OAuth2User {

    // 응답 정보를 담고 있는 객체
    private final OAuth2Response oAuth2Response;
    private final String role;

    @Override
    public Map<String, Object> getAttributes() {
        return null;
    }

    // 권한 반환
    @Override
    public Collection<? extends GrantedAuthority> getAuthorities() {
        Collection<GrantedAuthority> collection = new ArrayList<>();
        collection.add(new GrantedAuthority() {
            @Override
            public String getAuthority() {
                return role;
            }
        });
        return collection;
    }

    @Override
    public String getName() {
        return oAuth2Response.getName();
    }

    // provider + providerId
    public String getUsername() {
        return oAuth2Response.getProvider() + " " + oAuth2Response.getProviderId();
    }
}
CustomOAuth2UserService- OAuth2 인증 과정에서 사용자 정보를 불러오고 저장하는 커스텀 서비스 클래스이다.
- 반환하는 OAuth2User 객체가 스프링 시큐리티 컨텍스트에 저장된다.
- 이에 따라 해당 사용자는 이후 요청에서 인증된 사용자로 인식된다.
@Service
@RequiredArgsConstructor
public class CustomOAuth2UserService extends DefaultOAuth2UserService {

    private final UserRepository userRepository;

    // OAuth2 인증 요청을 받아 사용자 정보를 불러오는 메서드
    @Override
    public OAuth2User loadUser(OAuth2UserRequest userRequest) throws OAuth2AuthenticationException {

        // 상위 클래스에 위임하여 사용자 정보를 불러온다.
        OAuth2User oAuth2User = super.loadUser(userRequest);
        System.out.println(oAuth2User.getAttributes());

        // provider 식별
        String registrationId = userRequest.getClientRegistration().getRegistrationId();
        OAuth2Response oAuth2Response = null;

        // provider에 따라 OAuth2Response의 구현체를 OAuth2Response에 저장한다.
        if (registrationId.equals("naver")) {
            oAuth2Response = new NaverResponse(oAuth2User.getAttributes());

        } else if (registrationId.equals("google")) {
            oAuth2Response = new GoogleResponse(oAuth2User.getAttributes());

        } else if (registrationId.equals("kakao")){
            oAuth2Response = new KakaoResponse(oAuth2User.getAttributes());

        } else {
            return null;
        }

        String username = oAuth2Response.getProvider() + " " + oAuth2Response.getProviderId();
        String role = "ROLE_USER";

        // 기존 사용자 조회
        UserEntity existData = userRepository.findByUsername(username);

        // 사용자가 없으면 새로운 사용자 저장
        if (existData == null) {
            UserEntity user = new UserEntity();

            user.setUsername(username);
            user.setEmail(oAuth2Response.getEmail());
            user.setRole(role);

            userRepository.save(user);

        // 사용자가 있으면 기존 사용자 정보 업데이트
        } else {
            existData.setUsername(username);
            existData.setEmail(oAuth2Response.getEmail());
            role = existData.getRole();

            userRepository.save(existData);
        }

        return new CustomOAuth2User(oAuth2Response, role);
    }
}
SecurityFilterChain 등록
SecurityConfig
@Configuration
@EnableWebSecurity
@RequiredArgsConstructor
public class SecurityConfig {

    private final CustomOAuth2UserService oAuth2UserService;

    @Bean
    public SecurityFilterChain filterChain(HttpSecurity http) throws Exception {

        // CSRF 보호 비활성화
        http.csrf(csrf -> csrf.disable());

        // 폼 로그인 비활성화
        http.formLogin(login -> login.disable());

        // HTTP Basic 인증 비활성화
        http.httpBasic(basic -> basic.disable());

        // OAuth2 로그인 설정
        http.oauth2Login(oauth2 -> oauth2
                .loginPage("/login")

                // 커스텀한 서비스 클래스를 설정
                .userInfoEndpoint(userInfoEndpointConfig -> userInfoEndpointConfig
                        .userService(oAuth2UserService)));

        http.authorizeHttpRequests(auth -> auth
                .requestMatchers("/", "/oauth2/**", "/login").permitAll()
                .anyRequest().authenticated()

        );

        return http.build();
    }
}
테스트
MainController
@Controller
public class MainController {

    @GetMapping("/")
    public String mainPage() {
        return "main";
    }
}
main.html<html> <head> <meta charset="UTF-8"> <title>Document</title> </head> <body> main page </body> </html>
MyPageController
- 로그인 후 접근 가능
@Controller
public class MyPageController {

    @GetMapping("/myPage")
    public String myPage() {
        return "myPage";
    }
}
myPage.html<html> <head> <meta charset="UTF-8"> <title>Document</title> </head> <body> my page </body> </html>
LoginController
@Controller
public class LoginController {

    @GetMapping("/login")
    public String loginPage() {
        return "login";
    }
}
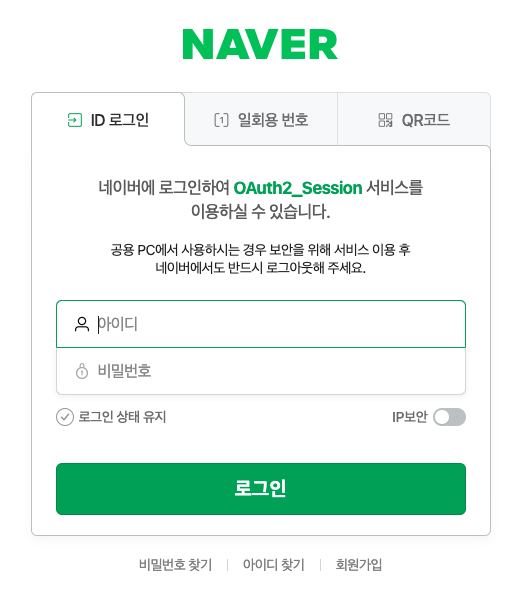
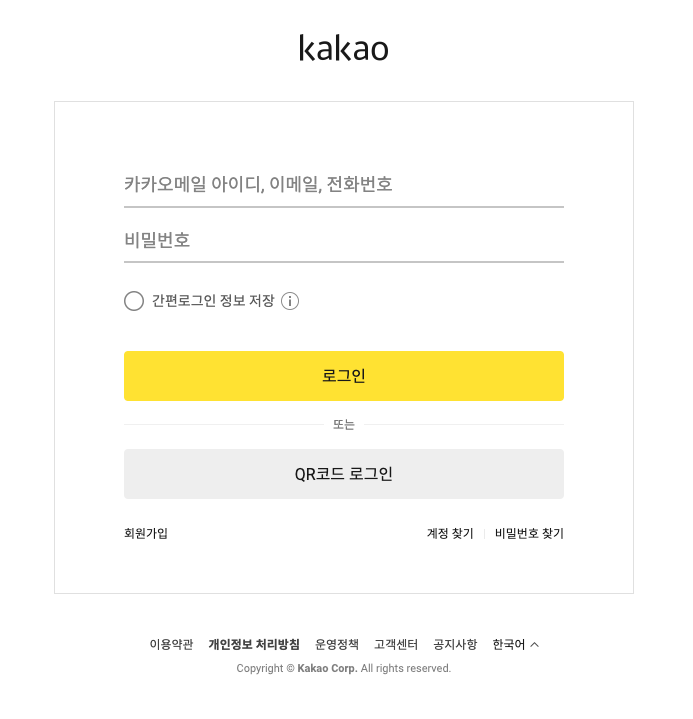
login.html<html> <head> <meta charset="UTF-8"> <title>Document</title> </head> <body> <h1>login page</h1> <hr> <a href="/oauth2/authorization/naver">naver login</a><br> <a href="/oauth2/authorization/google">google login</a><br> <a href="/oauth2/authorization/kakao">kakao login</a> </body> </html>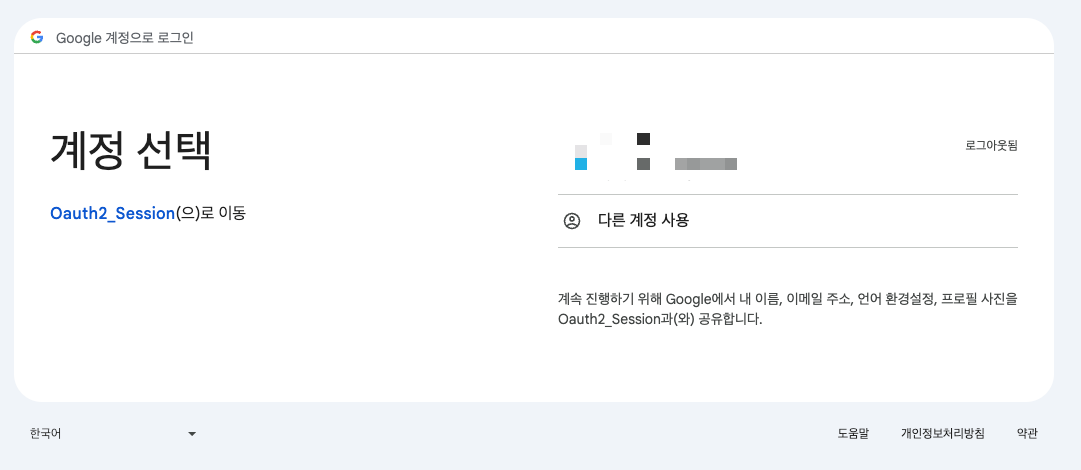
로그인 후 DB 확인
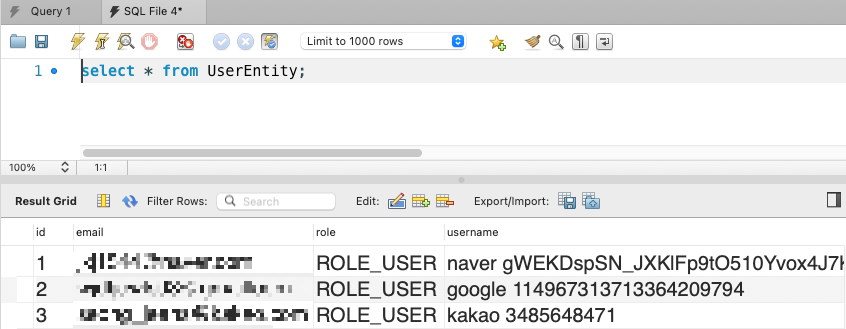
이번 실습은 한 번 따라해보는 것에 의의를 두고 진행했다. 조만간 진행될 팀 프로젝트에서 소셜 로그인 기능을 넣어보고 싶어서 공부 중이다. OAuth2에 대해 처음 공부해 보는 것이라 이해가 안 되는 부분도 있고 어려웠지만 전체적인 흐름에 대해서는 정리가 된 것 같다. 데이터베이스에 로그인한 사용자 정보가 저장되는 것까지는 확인했으니 이것을 어떻게 활용해야 하는지 좀 더 공부해봐야겠다.'Spring Framework' 카테고리의 다른 글
[Spring Security] OAuth2 소셜 로그인 (JWT 방식) (0) 2024.05.20 [Spring Security] JWT 간단히 실습해보기 (1) 2024.05.19 [Spring Security] 로그인 실패 시 계정 잠금 (0) 2024.05.16 [게시판 만들기] 5️⃣ 이메일 인증 처리 (1) 2024.05.14 [게시판 만들기] 4️⃣ AJAX를 통한 검증 처리 (1) 2024.05.13